
To not miss out on any new articles, consider subscribing.
About a month ago, I had to install Ubuntu Operating System (18.04) on my laptop for some projects I am working on in school. What seemed like a pretty easy task soon turned into a series of multiple bugs and setbacks. It was so frustrating, so I decided to set up a virtual machine and install Ubuntu on it. This was easier for me to get done.
In this article, I will be sharing my process of setting up a virtual machine on my macOS Big Sur, installing Ubuntu 18.04 on it, the approach that finally worked for me, hacks around the errors I faced, and general tips for a better experience
Introduction
My initial plan was to dual boot the Ubuntu OS on my system alongside my macOS. After a few failures, I finally got it installed. However, most drivers were not working with the Ubuntu OS. Some of these drivers that were no longer working are trackpad, keyboard, Bluetooth, wireless adapters, volume, and brightness. These are a lot of peripherals necessary for a working system. I found a way around some of them, using external devices and physical adapters, but this made the process of working with the Ubuntu OS very cumbersome. To solve this, I decided to install Ubuntu on a Virtual Machine on my macOS.
My laptop specs:
Model: MacBook Pro 2020,13-inches
Processor: 2 GHz Quad-Core Intel Core i5
OS: macOS Big Sur 11.15.1
RAM: 16GB
Hard drive: 400GB
Why would you consider setting up a Virtual Machine?
There are many reasons for running a virtual machine on your system. Some of which include running multiple operating systems on one computer, easier software installation, and testing. Virtual machines can also serve as a form of disaster recovery. My reason for needing a virtual machine was the first, as I needed the Ubuntu OS for some projects I am working on.
There are many available virtual machines, some being system virtual machines and others being process virtual machines. System virtual machines provide a platform for an entire operating system while process virtual machines give a platform for the execution of a single process (i.e one program). Xen, VMWare, Virtual Iron, Parallel Workstations, OracleVM are examples of system virtual machines, and Java VM, .NET VM are examples of process virtual machines.
I needed a system virtual machine and I decided to go with the Oracle VM VirtualBox as my virtual machine, installing Ubuntu 18.04 on it. That is what this article will focus on.
How to download Oracle VM VirtualBox and install
Oracle VM VirtualBox is a cross-platform virtualization application. A virtualization application is an application or platform that creates an isolated execution environment on a system for running applications. Oracle VM VirtualBox, as a virtualization platform, installs your currently existing operating system and extends it so you can run various other operating systems in multiple virtual machines, as well, at the same time. There is no limit on the number of virtual machines you can run, so long as there is sufficient memory and disk space.
Currently, Oracle VM VirtualBox runs on
- 64-bit Intel-based macOS 10.13 (High Sierra) and above systems
- 64-bit Windows 8.1 and above
- Windows Server 2012 and above systems
- Most Linux OS based on Linux kernel 2.6, 3.x, 4.x or 5.x, and
- Oracle Solaris 11 64-bit systems.
The installer package can be gotten from the download page, choosing the right file depending on your system’s main OS. After going through the installation process, you will have to download the OS you want to run and build your virtual machine.
Downloading Ubuntu OS ISO file
To run Ubuntu 18.04 OS, you have to get an image of the OS. You can download it from here, choose the Desktop image so it downloads with a GUI, not as a server. If you want the latest stable version of Ubuntu, you can check this page. All Ubuntu releases can be found on this site if you are looking for a specific older version.
How to run and create a new VM
Now that you have installed VirtualBox and downloaded the image for your desired OS, you will proceed to build your virtual machine in the following steps:
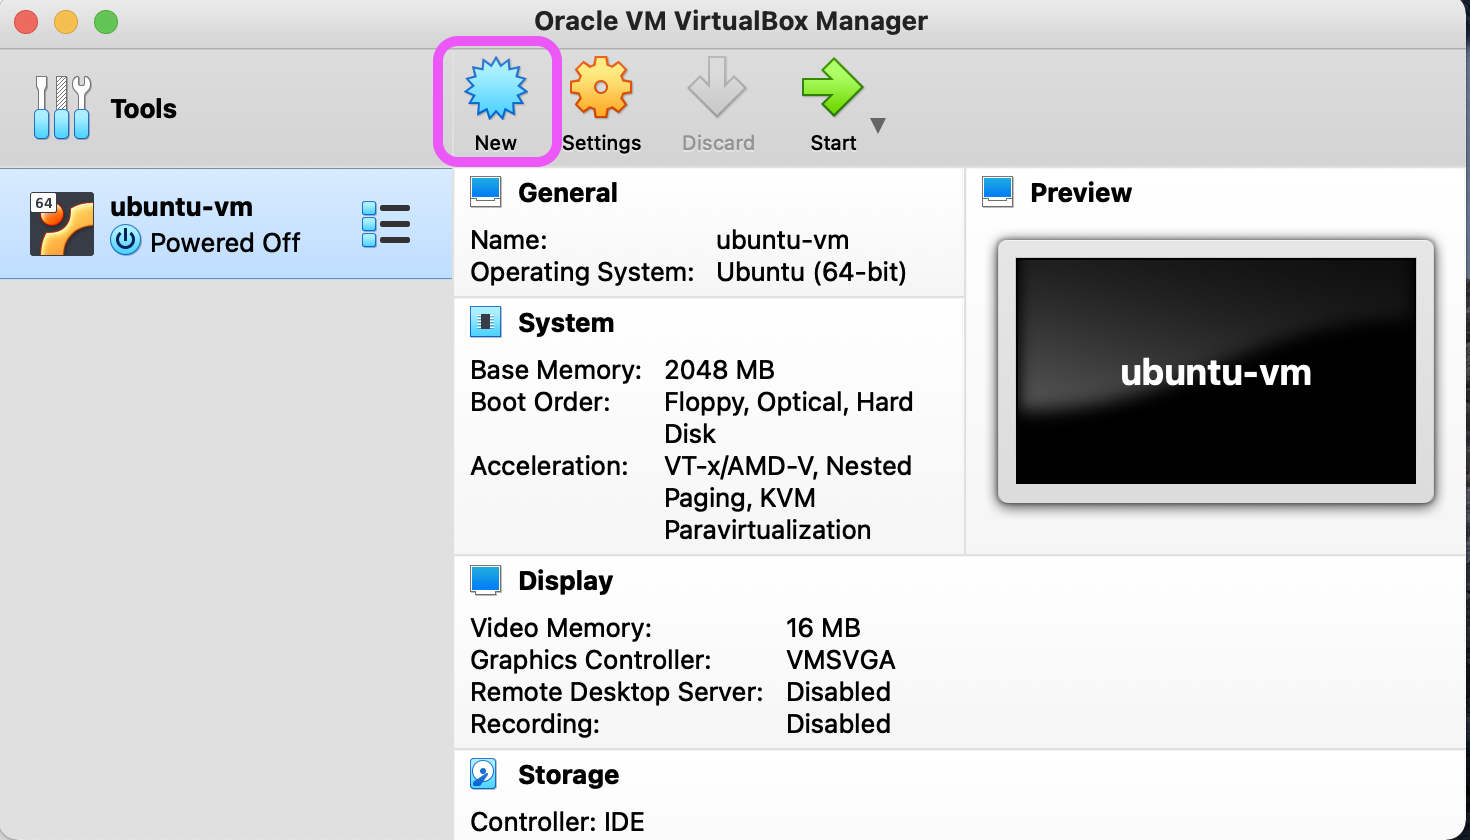
- Open the VirtualBox application and click on the New button.
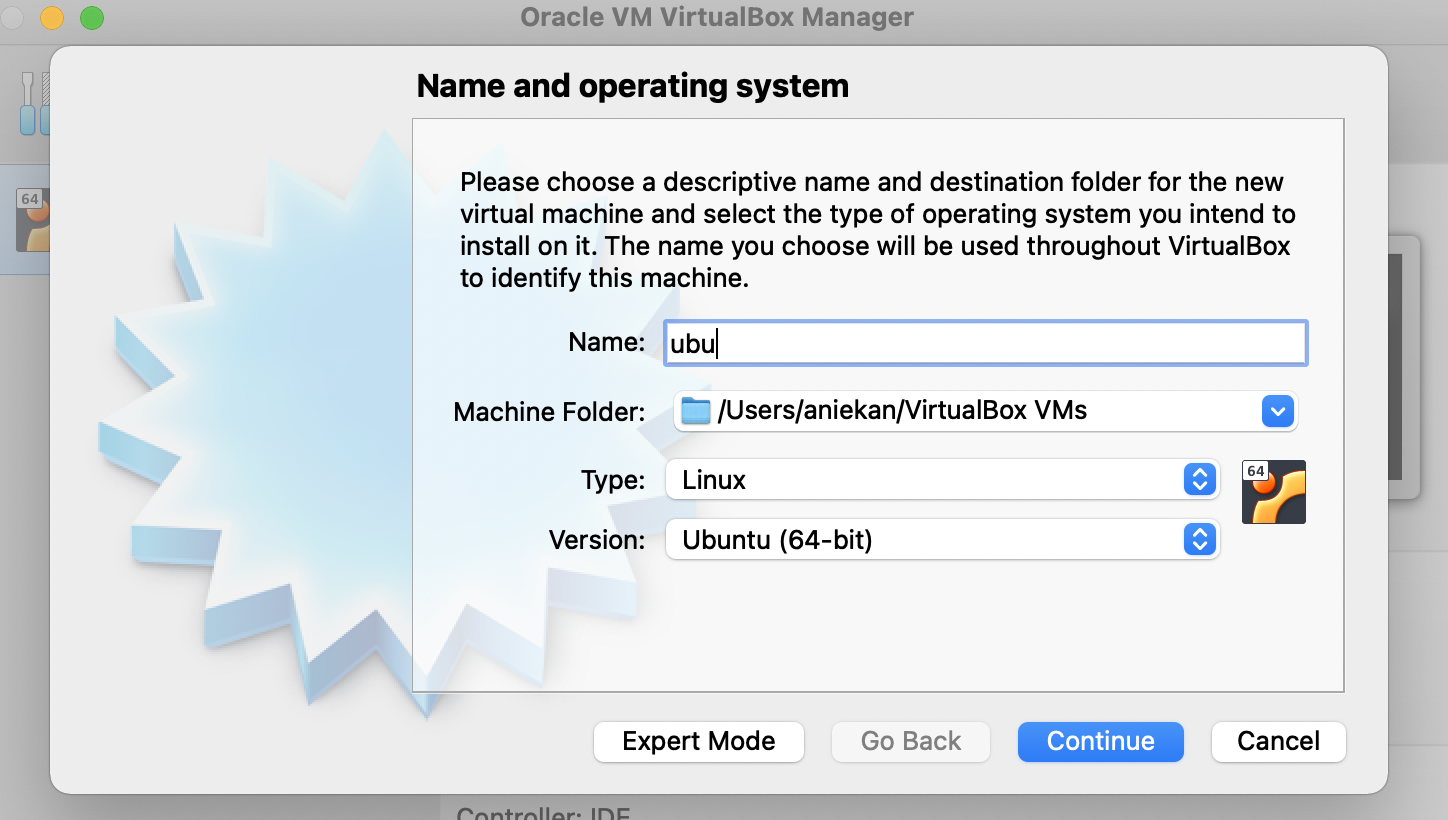
- Name your new virtual machine, set the OS type and version, and destination folder for the machine. Use a descriptive name so you can identify the OS and version of the virtual machine easily. VirtualBox is quite smart that if you type “Ubu..” as the name, it automatically sets the type to Linux and version to Ubuntu 64-bit based on my computer. You can change it though to whatever you want.
- Allocate the desired memory size (RAM) for the virtual machine. Recommended size is 1024MB. However, only allocate what you can space because your main OS will not be able to access this allocated RAM while the virtual machine is running.
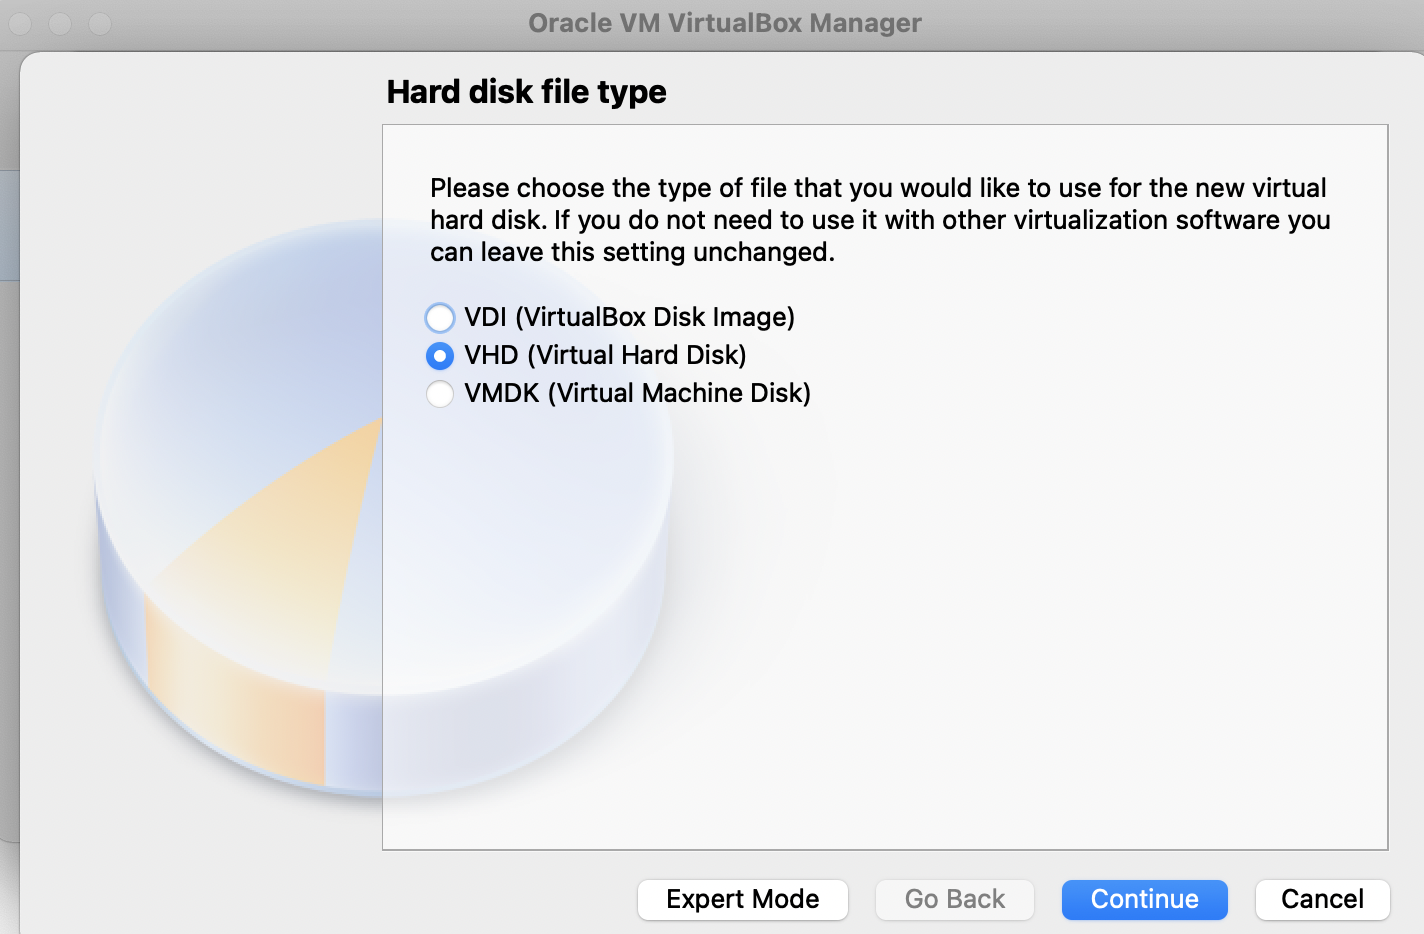
- To add a hard disk for the virtual machine, select the Create a virtual hard disk now option and choose VHD (Virtual Hard Disk) as the hard disk file type. You can either select a fixed-size hard disk file or a dynamically allocated hard disk file. A fixed-size hard disk file allocates the set size to the virtual machine at the time of creation while a dynamically allocated hard disk file grows the portion of your physical hard disk allocated to the virtual machine until it reaches the maximum fixed size set. However, if you delete files to free up a dynamically allocated hard disk, the size does not reduce. A fixed hard disk file is slower to create on some systems but most times, faster to use.

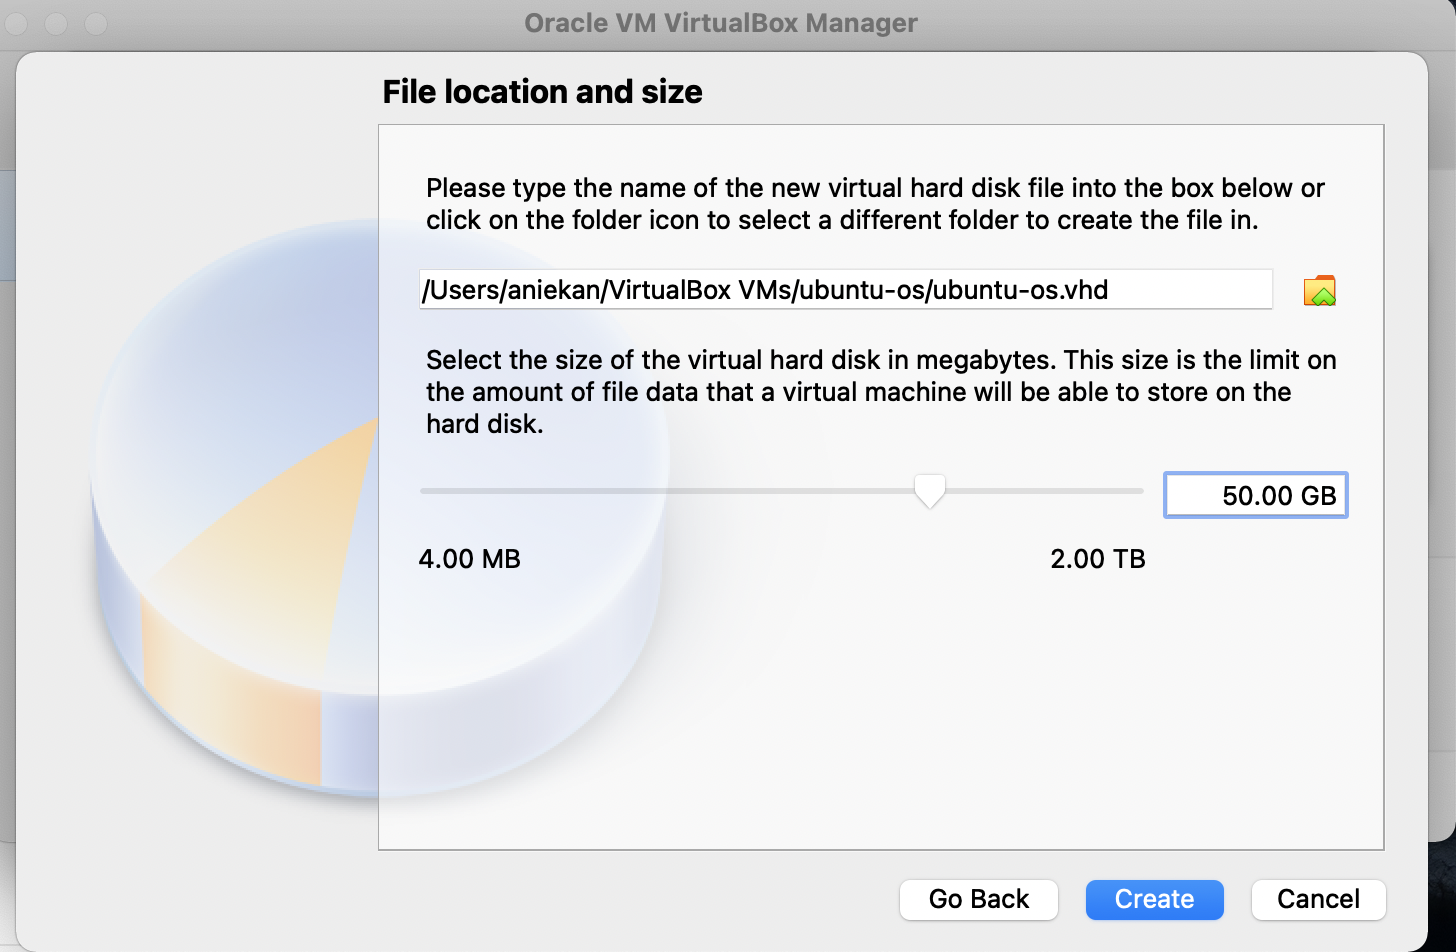
- Select a destination folder for the hard disk file and set the size. I recommend 40.00GB if your computer has the capacity. Click Create.
Installing the Operating System
Now, you have created a new virtual machine and you need to install the desired operating system on it. For this, you need to know where your OS ISO file is stored on your computer.
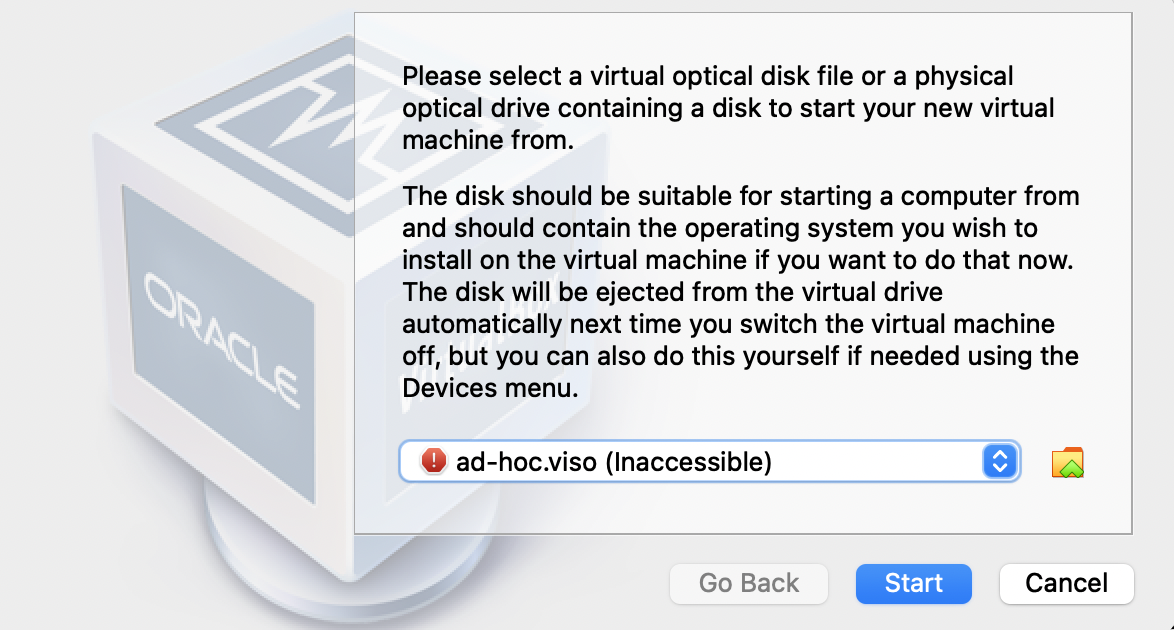
- Double click on your newly created virtual machine to start it. When you start it for the first time, a dialog box will appear asking you to select a virtual optical disk file or physical optical drive containing a disk that contains the OS you wish to install on the virtual machine.
- Click on the folder icon and click Add to add a new operating system. The documentation stated you should be able to open your file explorer, locate the ISO file and add the OS from there. However, for me, the process kept crashing and I was unable to add the OS. This leads to the next step.
- If step 2 fails, to be able to add the OS, you select the VirtualBox machine and click on Settings. In Settings, go to the Storage tab.

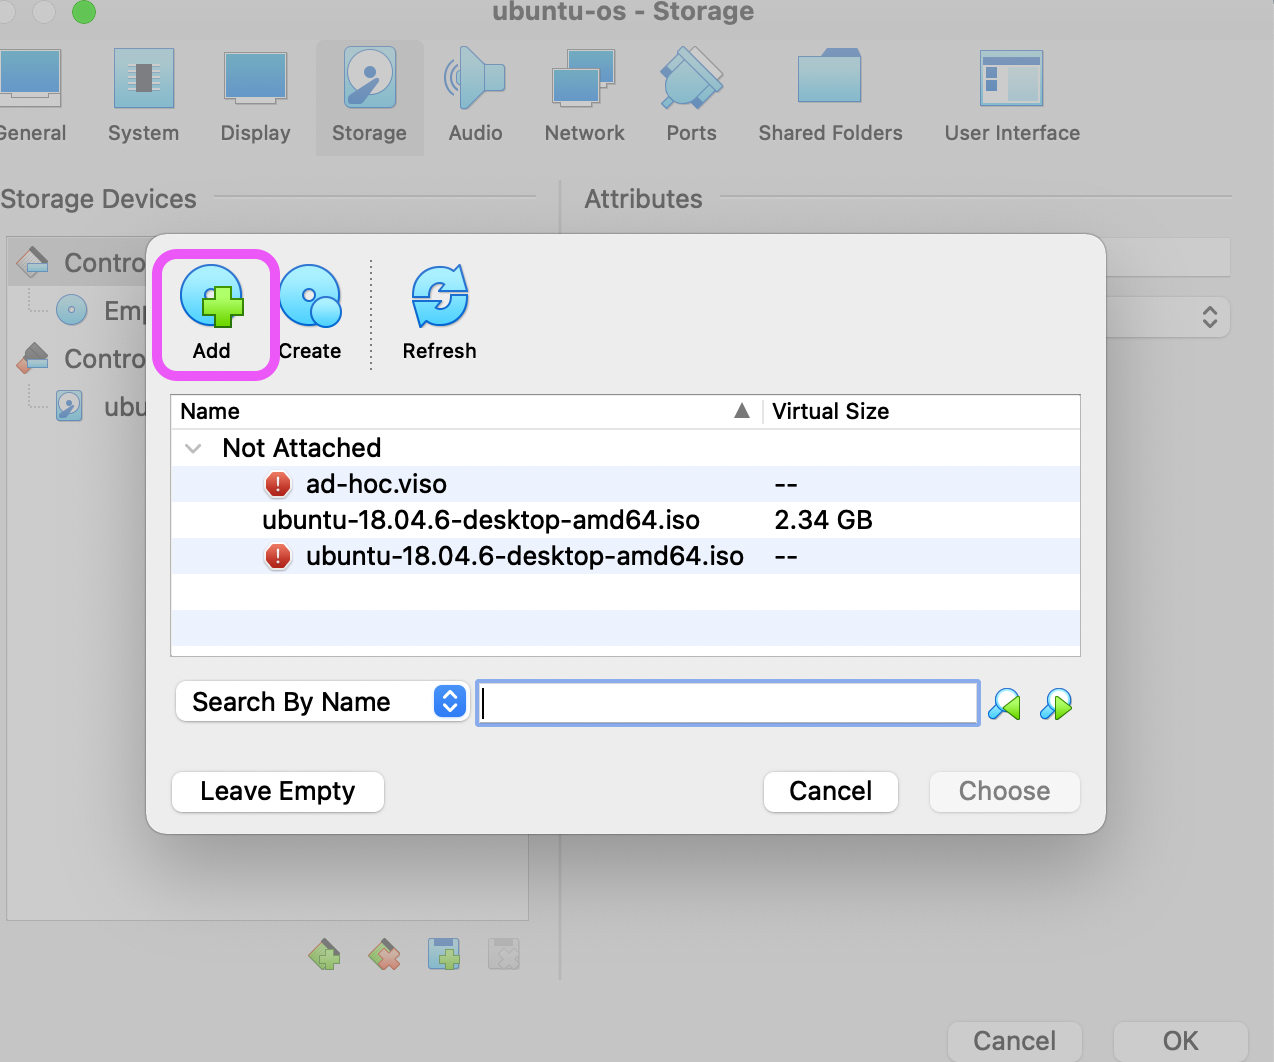
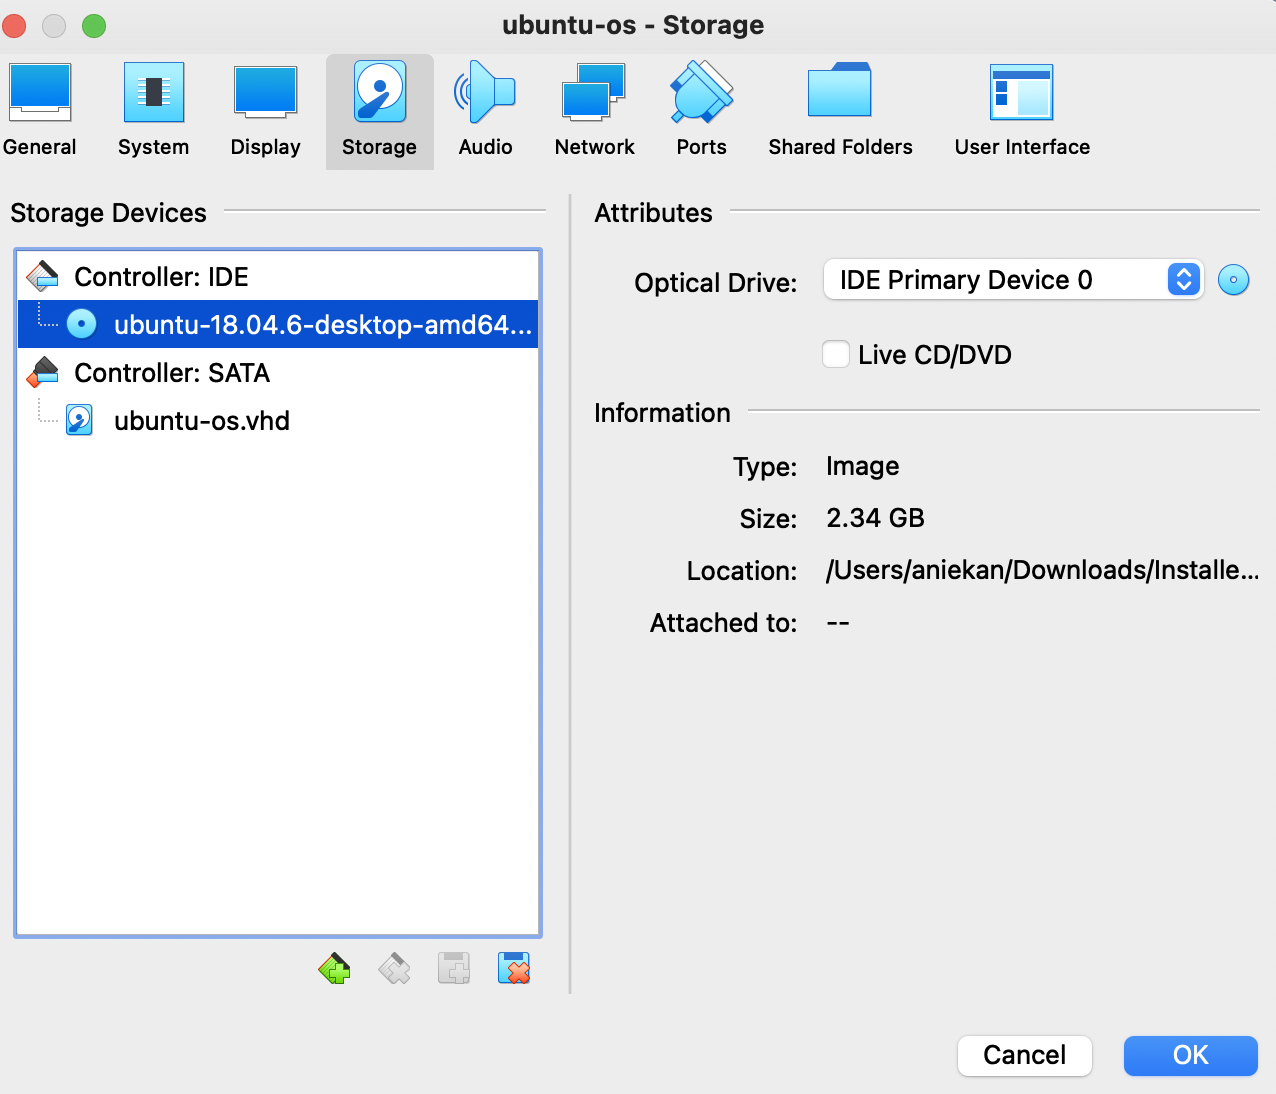
- In the Storage tab, add the .iso file by clicking the Adds optical drive icon beside Controller: IDE, click Add, locate your ISO file in your finder and select it.
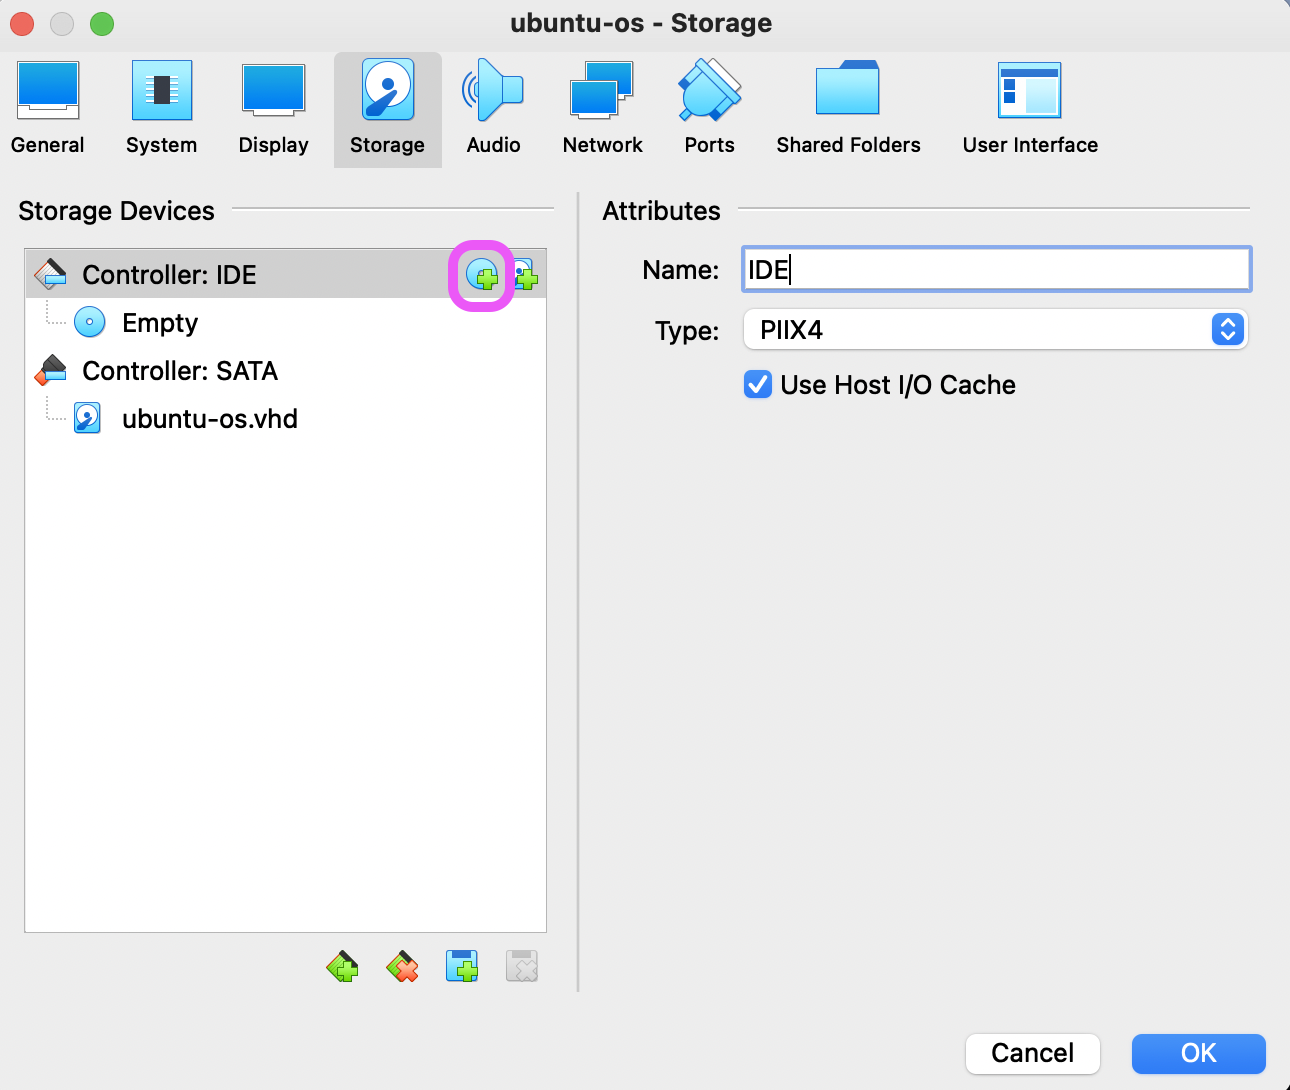
- You can then delete the Empty one that was there, making your desired ISO as IDE Primary Device 0. Your Storage tab should then look like this, with your Ubuntu ISO linked to the newly created Virtual Machine. Then you click Ok.
- Now, you can start your virtual machine and it will boot the OS. You will go through the installation steps and when that is done, your desired operating system will be loaded and available to use on your virtual machine.
- If you wish to extend the functionalities that come default with the Oracle VirtualBox, you can download extension packs. Oracle provides a base extension pack that provides functionalities for USB 2.0 and 3.0, webcam, disk encryption, among others. It can be downloaded here.
Resizing your virtual machine window
When you start your VM, you might notice that the window is tiny. To increase the size of the window, you switch to scale mode by pressing (Cmd + C) on your keyboard and the window becomes bigger. You can still increase or decrease this to your preference by dragging the arrows at the corners. While in scale mode, the main menu bar is hidden, so if you need to access it, you need to leave scale mode. To exit scale mode, press (Cmd + C) again.
Conclusion
I hope this article has been helpful and you have been able to start your virtual machine on your macOS High Sur successfully.
Thank you for reading.
Aniekan.
Further documentation
To not miss out on any new articles, consider subscribing.
